
Table of Contents
Posting your photos online always carries a risk: anyone could download and use them without your permission. However, this should not stop you from sharing your work. In this article, we provide some practical tips to protect your photos online and prevent image theft.
As we always say when discussing this topic, it’s important to recognize that no measure is foolproof. The goal is to make things harder for content thieves—or at least harder than on other websites. If two similar cars are parked on the street and one has an alarm while the other doesn’t, they’ll likely steal the one without the alarm first.
1. Use Watermarks


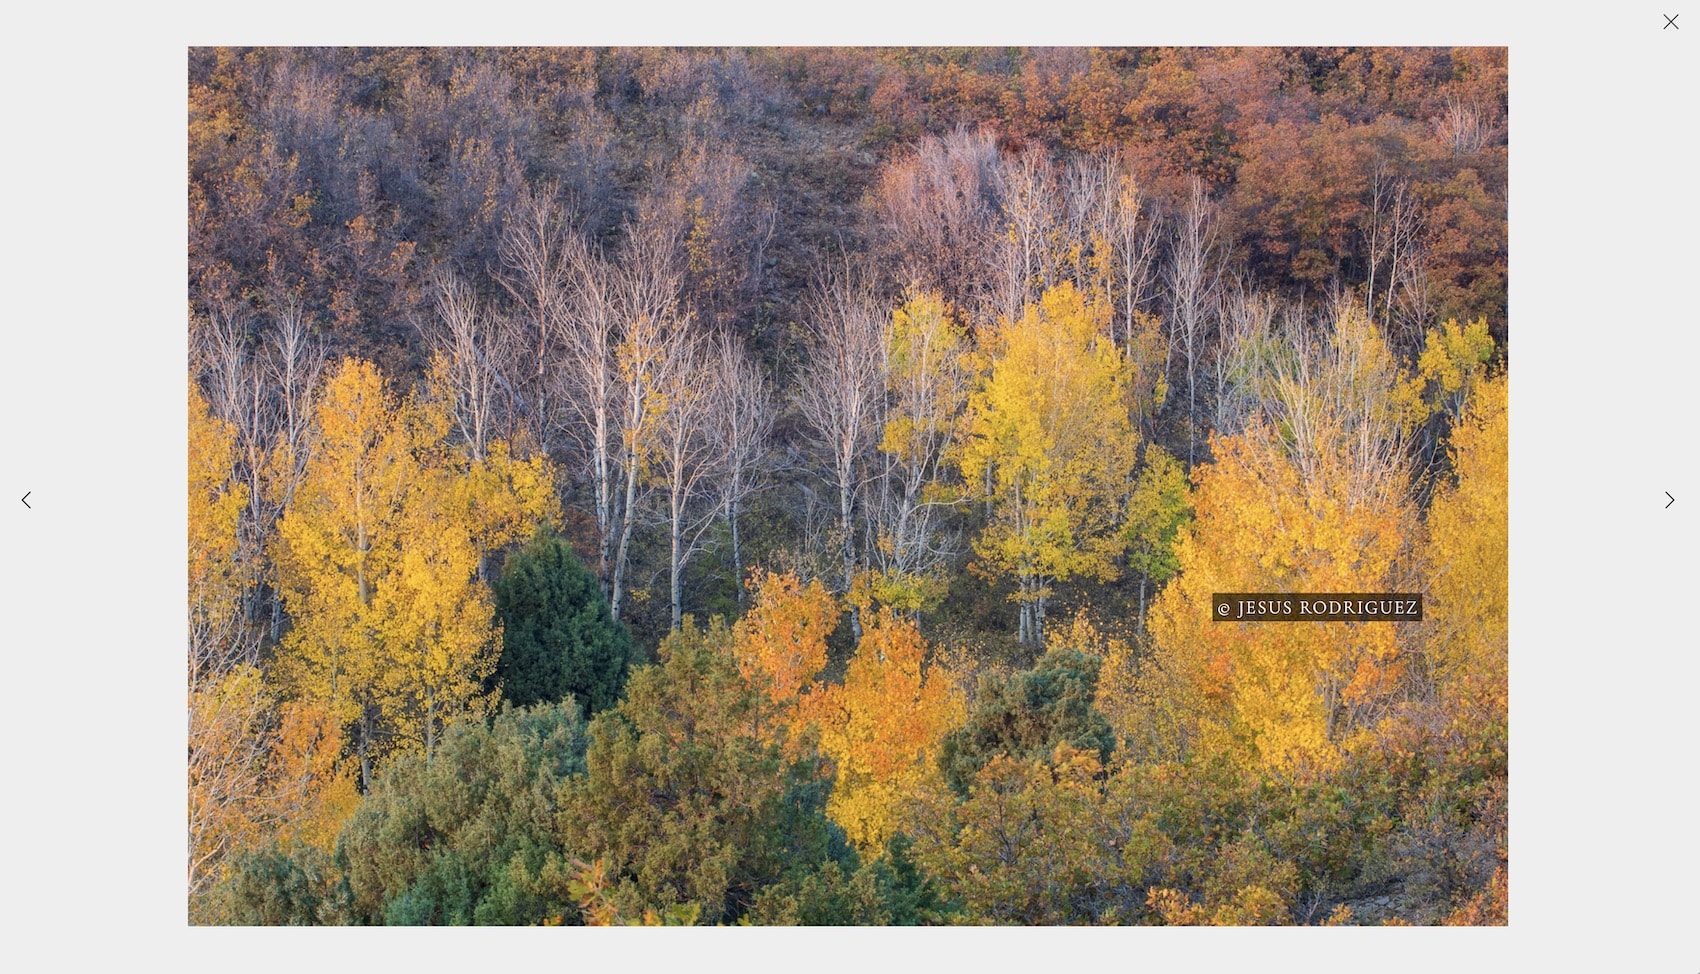
One of the most straightforward ways to protect your photos online is by adding a visible watermark to the image. This involves overlaying a semi-transparent logo or copyright text onto the original photograph. This approach has two main effects:
- It allows you to place your “signature” on the image, clearly establishing authorship even if the photo is used without permission.
- It reduces the image’s usefulness, as a photo with an overlaid logo is less appealing in any context.
As we will see, a watermark is more effective the larger and more centered it is on the original image. However, the watermark should not be so large that it prevents viewers from appreciating the subject and quality of the photograph—balance is key.
1.1. How to Make Your Watermark More Effective
Your watermark will be more effective the harder it is to remove without significantly altering the original image. To achieve this, you can follow these guidelines:
- Place the watermark over detailed and relevant areas of the image. It’s always easier to remove a watermark from a clear sky or a white wall than from a face or a tree.
- Avoid positioning the watermark too close to the edges. This prevents it from being easily removed by simply cropping the photo.
- Increase the size of the watermark. The larger it is in relation to the photo, the harder it will be to remove.
1.2 When to Add a Watermark
In general, there are two options:
- Prepare photos with the watermark before uploading them to the web. You can use specialized software like Adobe Lightroom for this. While this method gives you full control, it adds an extra step every time you want to upload or update photos on your site. Additionally, it prevents you from selling images without a watermark, as it becomes permanently embedded in the original photo.
- Use a web system that allows you to upload the image and apply the watermark separately. This option is much more practical: it protects the photos displayed on your website with the watermark, while keeping the originals unaltered for generating thumbnails or downloadable files in case of sales.
At Bluekea, we use this second method. Our system allows you to use your own watermark or one generated directly on the website, with different positions and independent watermarks for each gallery.
2. Limit the Maximum Size
Another useful measure to prevent image theft is to limit the size and quality of the photos you upload to your website. The potential use of your photos in case of theft partly depends on their dimensions: the larger the size, the more versatile they are, even for printing. If your website displays photos at full size, you can limit their maximum dimensions to around 1,200 pixels on the longest side. This is a general recommendation, and the ideal size may vary depending on the specific use of the photos. The goal is to ensure images are as small as possible without sacrificing quality. You can experiment with different sizes, gradually reducing them until you find the right balance.

It’s important to note that when we talk about size, we always refer to the pixel dimensions of the image (width by height). If you’re considering reducing the resolution in dots per inch (DPI), don’t waste your time—it’s irrelevant. As we explain in this article, resolution is not a significant factor for web images.
Finally, you can also limit the photo’s quality—and thus its usefulness for unauthorized use—by increasing the compression of the JPEG file. However, there’s a limit: excessive compression reduces sharpness. Once again, it’s about finding the right balance between protection and quality.
3. Prevent Direct Downloads
Web browsers make it easy for content thieves. Copying and pasting text from a website is simple, and downloading photos is just as effortless: on a computer, a right-click gives access to the download option; on mobile, users can drag the image or long-press to save it.
Fortunately, many websites implement mechanisms to prevent these actions. They can disable the right-click context menu and display a copyright notice instead. On mobile, some sites use an overlay or shield to prevent users from touching or dragging the image.
At Bluekea, our photographer websites use both of these methods. If your website is hosted elsewhere, check with your provider or administrator to see if these protections are available.
4. Clearly State Copyright or Licensing
First, it’s important to clarify that in most countries, photos legally belong to their creator from the moment they are taken, even if authorship isn’t explicitly stated on the website. This protection is typically covered under copyright laws or intellectual property regulations. While specifics may vary by country, similar legal principles generally apply worldwide.
That said, it’s always advisable to include a copyright notice as a deterrent. You can add it to your website’s legal notice or even place it under each gallery. A simple example could be: “All images are the property of [Your Name]. Reproduction without the author’s express permission is strictly prohibited.”
If you prefer to allow the use of your photos under specific conditions (for example, sharing without commercial use), you can choose a Creative Commons license. Learn more at creativecommons.org.
5. Protect Against Screenshots if Necessary
Of all the methods used to steal photos, taking a screenshot is the hardest to prevent. Since web browsers cannot block device-level functions, no website can fully prevent screenshots.
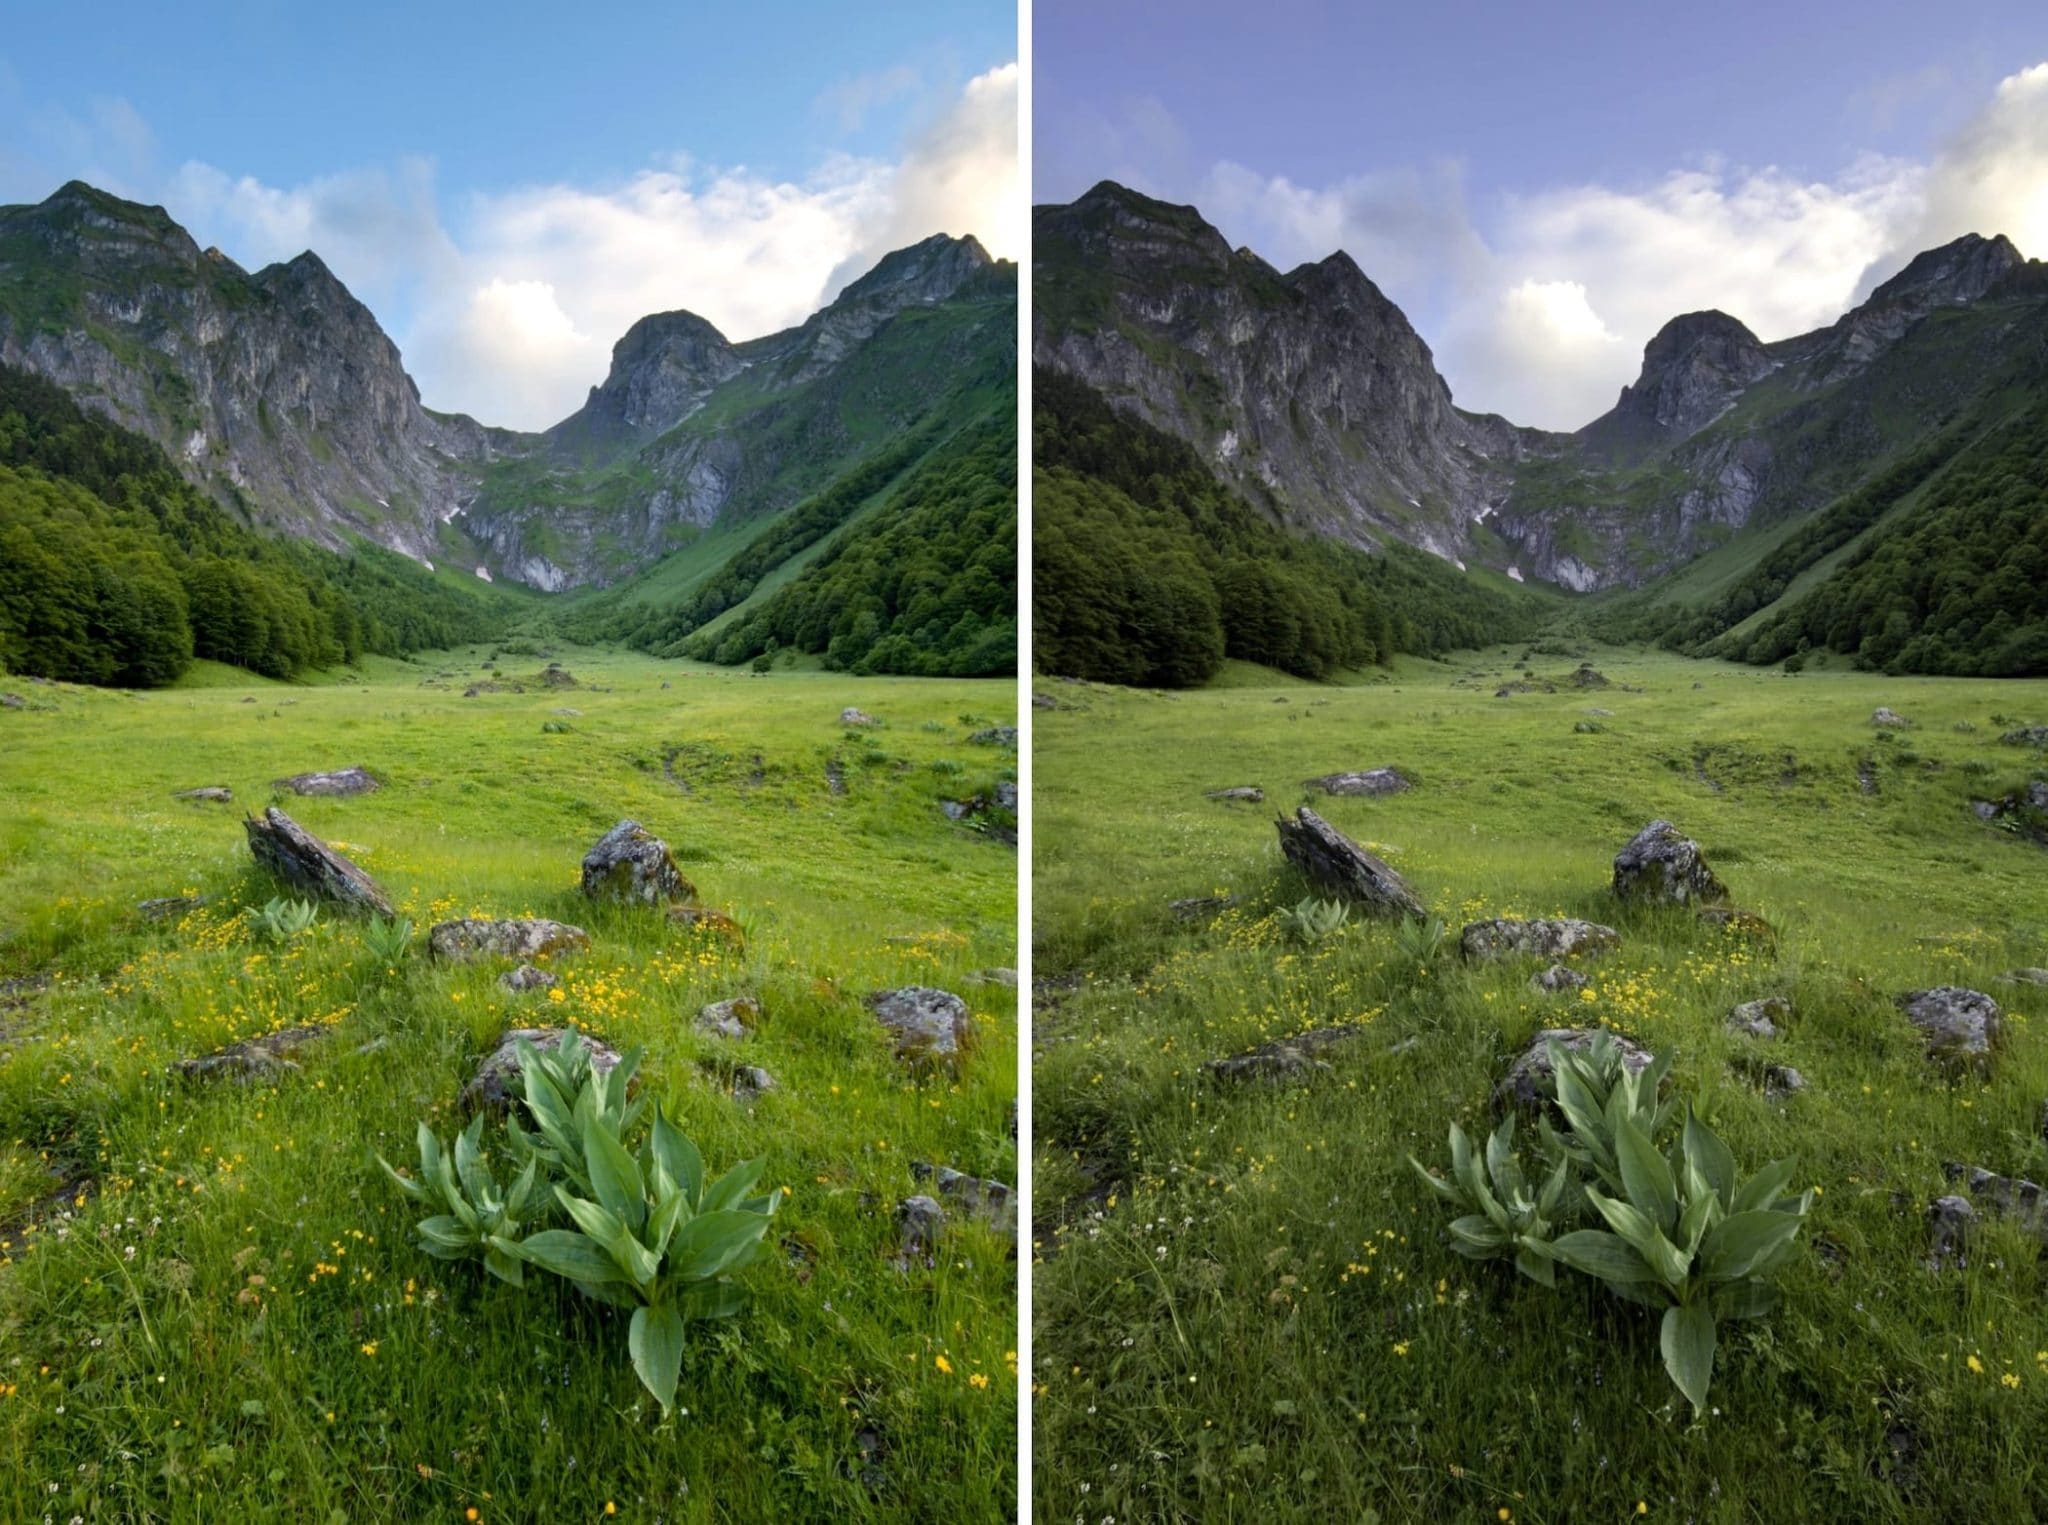
If your photos are still being stolen via screenshots despite the previous measures, you can implement a protective mask over the image. While this is an extreme solution, it can be useful—for example, in client galleries where users might try to take photos without paying.

A protective mask displays only a small portion of the photo, with the rest semi-hidden behind a high-opacity layer. The visible section can be moved with a mouse or finger, allowing visitors to navigate the image—but never see it in full.
This makes it nearly impossible to steal the photo via screenshot. Like any method, it’s not foolproof, but it adds a significant layer of protection. This feature is available for client galleries on Bluekea websites.
Conclusion
In short, while there’s no foolproof way to protect your photos online, applying several of these measures can help prevent image theft and keep your work safer—without stopping you from sharing it with the world.
You might also like


An introduction to Photoshop AI: how to change backgrounds, remove elements, and extend images
learn more